
The Waneta Expansion Project (WAX) is located near the existing Waneta Dam site at the confluence of the Pend d’Oreille and Columbia Rivers approximately 10km south of Trail, British Columbia. The WAX owners consist of a partnership between Fortis, Columbia Basin Trust and the Columbia Power Corporation. This design-build project was awarded to an Aecon/SNC Lavalin joint venture (ASL-JV) in late 2010 and is expected to be in operation mid 2015.
The WAX consists of a new 335MW powerhouse including two new Francis turbine units, each generating approximately 167MW. The powerhouse is located downstream of the existing Waneta Dam and will make use of excess water that would otherwise be spilled during the runoff season. Water will be funnelled to the turbines through an intake structure and two 10.5m diameter, concrete lined penstock tunnels. A 10km transmission line will connect the powerhouse to existing electrical grids.
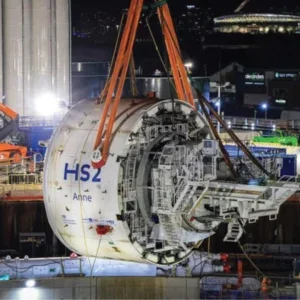
A joint venture of J.S. Redpath Limited, and Frontier- Kemper Constructors ULC, Waneta Tunnelers (RFK), was subcontracted by the heavy civil contractor ASL-JV, to excavate the tunnels and install the cast in place concrete liner.
Access Adit
To start the penstock tunnel excavation early, while powerhouse and intake excavations were underway, a smaller access adit tunnel was developed. The access adit was 6m wide by 6m tall, modi ed horseshoe in shape, and 135m long with a grade of -12 per cent. Developing the access adit allowed RFK to excavate the penstock tunnels and remain off of the surface works critical path and out of the way of other site excavations. The access adit was also used for initial training for those workers not familiar with underground excavations (Figure 1).
Four meter round lengths were drilled using a 2-boom Tamrock drill jumbo. A typical round consisted of 75 holes, 45mm in diameter with three 100mm diameter relief holes in the cut. Hole spacing was approximately 800mm by 800mm. Explosives used were packaged emulsion, "stick powder", with Nonel detonators. All blasts were initiated using electric blasting caps which were tied into detonating cord. Ground support in the access adit consisted of a minimum 50mm layer of 35MPa, ber reinforced, shotcrete followed by a typical 2m by 2m pattern of 2.4m long expandable (Swellex) type rock bolts. The access adit had low cover and would be used as primary ingress/egress during the tunnel excavation and the concrete liner phase. Eight steel arch sets were therefore installed at the portal on one meter centers to provide additional ground support. All utilities and ventilation were routed through the steel sets and down the access adit. RFK was able to complete the 135m-long access adit in 40 days, working five days per week with two 10-hour shifts per day.
Penstock Tunnel Excavation
Two penstock tunnels were designed parallel, 10m apart, horseshoe in shape, and approximately 11m in diameter. After excavation a 300mm thick cast in place concrete liner would be installed for hydraulic efficiency purposes only. Due to the large diameter of the penstock tunnels RFK determined the safest and most efficient excavation method would be top heading and bottom bench. Separating the excavation into top and bottom halves allowed RFK to keep tight control over ground support and minimise the amount of open ground at any time. Another deciding factor was the availability of smaller mobile equipment.
Based on the tunnel size and expected ground conditions initial planning suggested further dividing the excavation through the use of a split top heading method. In this scenario the top heading in each penstock tunnel would have two separate working faces side by side, one slightly ahead of the other, each approximately 5m wide by 5m tall. This method, similar to a pilot and slash, would have provided four working faces at any given time yielding greater flexibility in the excavation cycle.
As access adit excavation neared the intersection of the penstock tunnels RFK encountered better than expected ground conditions and determined that a full width top heading could be taken without compromising safety during the ground support cycle. Based on this information RFK chose to take a full face top heading, 11m wide by 5m tall, semicircular in shape. Doing so eliminated the flexibility of four separate working faces but allowed RFK to advance the entire top heading with one blast instead of two, making the operation more efficient overall.
Conversely, sequencing the excavation cycles between the four working faces would have required careful day to day planning and left little room for errors such as equipment breakdowns. Bottom bench excavation was always planned as full face using horizontal drilling and taken after top heading excavations were completed in each tunnel.
Controlled blasting techniques were employed during top heading excavations to help define the excavation line and minimise overbreak in efforts to reduce the amount of concrete placed during the tunnel lining phase. Top heading drill patterns had approximately 98 blast holes with interior spacing averaging 800 by 800mm. The perimeter of each round was line drilled with spacing averaging 450mm and every other hole loaded during the blast. Four meter round lengths were drilled using the Tamrock 2-boom jumbo. Mucking was done using two CAT Elphinstone R1700G Load Haul Dump (LHD) scoops. Due to the wide top heading, 11m, RFK was able to use both LHDs to muck the face simultaneously, passing in the tunnel near the face. The use of two LHDs at once helped decrease the mucking cycle.
From the access adit intersection power tunnel excavation was uphill at approximately 17 per cent for 190m and downhill at approximately -15 per cent for 20m in both tunnels. Blasted rock was taken to the downhill side of one power tunnel which was used as a muck bay. The downhill side of the adjacent tunnel was used as a sump. Blasted rock was hauled to surface from the muck bay after the heading was completely mucked out.
Initial temporary ground support, identical to that installed in the access adit, was installed in the penstock tunnels to allow RFK to continually advance the heading. All shotcrete was placed using a Normet Spraymec robotic shotcrete machine. Shotcrete was transported from surface using a single, 7 cubic meter, underground remix truck. Permanent ground support, consisting of 22mm diameter by 4m long, fully grouted rebar dowels were installed noncritical path behind the working face. All permanent ground support was installed based on a prescription by the onsite geotechnical engineer. Five separate rock classifications were defined and evaluations carried out daily after each blast was taken.
Ground support classifications ranged from Class I, spot dowels only, to Class V, 100mm of fiber reinforced shotcrete and lattice girders. Ground conditions in the penstock tunnels were good enough that RFK was only required to install Class I and Class II ground support.
To ventilate the underground excavations RFK used a fully reversible suction system. Two 1.3m-diameter, 200hp ventilation fans were located on surface adjacent to the portal entrance. Two separate steel ducts of the same diameter were connected to the fans and advanced through the access adit. Once at the access adit/penstock tunnel intersection, one steel duct would split off to each tunnel. The steel ventilation duct always remained approximately 18m away from the working face in the penstock tunnels while a smaller 30hp, 0.9m diameter booster fan was used to push fresh air directly toward the working face. The 30hp booster fans were set up in each tunnel in a fixed location and used 0.9m flexible ducting, advanced with the heading. Average air flows in the penstock tunnels were approximately 5,500cu.m per minute.
Other utilities such as compressed air and service water were carried in 100mm diameter HDPE pipe hung along the walls of each tunnel.
Electrical cables for tunnel lighting and equipment were carried on the opposite side of the tunnel as the compressed air and water lines.
RFK was able to excavate both top headings, 451 linear meters total, in 139 days and completed the bottom benches in only 82 days.
Two disadvantages associated with the steep grade excavations were difficulty mucking uphill and increased exposure during ground support operations. RFK was able to mitigate the latter by using a remote shotcrete arm on the Normet Spraymec allowing an initial layer of shotcrete to be installed prior to bolting. Shotcrete accelerator was used to reduce cure times so that bolts could be installed during the same shift. A mechanised bolting machine was used to install the expandable bolts, again minimising exposure to the operators. Excavating and mucking uphill was technically more difficult for operators but the chosen equipment was designed for underground mines where steep grades are more common. The slope was hard on tires, but with careful operation standard equipment was used effectively without requiring modification.
One advantage of the steep grade was that a dewatering pump was not required during ground support, drilling, and loading cycles to keep the face dry.
Concrete Liner
A smooth concrete liner was specified to minimise head losses through the penstock tunnels. Initial plans were for a modified horseshoe, or D-shaped, tunnel cross section with finished inside dimensions of 10m x 10m. Prior to the start of excavation a change order was approved converting the finished tunnel shape to full round 10.5m finished diameter. With permanent ground support being installed during the excavation phase the liners would not be exposed to any ground loads. The maximum design load was thus the pressure differential caused by rapid dewatering. While the tunnels are in use, and full of water, the ground around them will become saturated with an equal hydrostatic pressure. In an emergency the intake gates could be closed and water would drain out of the tunnels in approximately two minutes. In this case of rapid dewatering the surrounding ground will maintain the full hydraulic head of up to 70m on the concrete liner until the pressure slowly dissipates through leakage. With this in mind the designers specified the use of 35MPa plain concrete to cast the 300mm thick liner.
It is notable that no reinforcing bar or fiber was required in the final concrete liner. The tunnel excavations were fully supported before concrete placement, and in the circular shape plain concrete was able to meet the design requirements. Reinforcement could have been used to reduce shrinkage cracking of the liner, but minor cracking was actually preferred as it will allow drainage into the tunnel during a rapid dewatering condition. Construction joints similarly required no water stop or bonding agents which would hinder equalisation of water pressures.
The design requirements did have restrictive finish specifications. The tunnel liner could not vary from line or grade by more than 12mm or by dimension/shape by more than 0.5 per cent. On the 10.5m diameter finished tunnel up to 52mm of differential between the height and width were allowed. Liner finish quality had to meet the British Columbia Ministry of Transportation Class II requirements. This required all honeycombs over 25mm diameter be filled, all bug holes over 5mm diameter be pointed and the surface given a rubbed finish where more than 50 such voids occurred per square meter. Surface irregularities 3mm high were allowed with restrictions on their size and number.
Tunnel form design and fabrication
To keep tunnel concrete works off the overall project’s critical path RFK requested proposals from seven different suppliers for a self advancing concrete form, which would allow a full pour cycle every 24 hours, safely operate on a 17 per cent slope, and be able to meet the specified finish requirements. Ceresola Tunnel Lining Systems (CTLS) of Switzerland (now Max Bögl Schweiz) was the chosen supplier and undertook the design and fabrication of a walking beam style steel form.
It was agreed the form would be able to cast a 7.5m-long full round section of the liner, walk itself through the tunnel on its own carrier, and be designed to operate on a 17 per cent slope. The form used by RFK on this project was the largest full round form CTLS had constructed to date.
Since the tunnel form was only 7.5m long internal supports "spud pins" were not required. To prevent movement during concrete placement the front of the form was braced against the surrounding rock and the rear against the previous concrete pour by six large screw jacks on each end. Two screw jacks in the crown, one on each side, and two in the invert.
In an effort to reduce cycle times a steel framed, cantilever bulkhead system was developed which would fasten to the upstream leading edge of the steel formwork, eliminating the need to brace the bulkhead against the rock. In surface trials the provided cantilever bulkhead system proved difficult to fit around other installations on the end of the form such as walkways and hydraulic cylinders. The individual parts were also too heavy to efficiently assemble by hand on a regular basis. RFK decided to use rough cut 2×8 bulkhead material and support it using traditional wood 2×4 walers and stiff-backs. The wood supports were not designed to withstand concrete loads in cantilever so they were pinned and braced to the perimeter rock using 20mm steel dowels.
Advancement was accomplished by designing the round form and the carrier to walk itself. Rollers were installed on the carrier beams to allow the form to slide back and forth with the carrier resting on the ground. The same rollers could be used to move the carrier when supported by the form. Not having wheels on the ground meant the form could be walked over mildly uneven surfaces, did not require a rail system, and was stable in the sloped tunnel. The form could also be shifted sideways by means of small cylinders in the feet of the carrier.
The tunnel form was fabricated and structural elements assembled for testing and inspection in Seveso, Italy. After workshop inspection the form was disassembled and loaded into 11 standard 40ft (12m) shipping containers for transport to Trail, British Columbia. On arrival the 15 full form elements (1.5m x 7.5m x 1.6m up to 4,200kg each), 10 half elements for the invert, handrails and miscellaneous parts were skidded out of the shipping containers at a storage yard approximately 7km from the project site. Each element was then individually transported to the assembly location at the project site.
Tunnel Form Assembly
On site the assembly location was on the surface near the head pond and adjacent to the 40m deep intake excavation. The carrier itself was assembled then five elements comprising the crown were bolted together. The crown was lifted as one unit and attached to the carrier. The side elements, or wings, were bolted together and hung from the crown while the invert was assembled in place under the carrier. After the major elements were bolted together the electrical, hydraulic, pneumatic, communications and water systems were installed.
Overall, surface assembly took 11 weeks. Once assembled, the form was tested and modifications were made as needed before walking the form under its own power to the edge of the intake excavation.
A location for the shortest lift crane radius (15m) into the intake was cleared and leveled for placement of a 275 US ton lattice boom crawler crane. This gave a load limit of 48,000kg at the self-imposed 75 per cent capacity to avoid the restrictions of a Critical Lift. Fully assembled the form weighed approximately 135,000kg.
The form elements, concrete placer car, and feet were removed to allow the carrier to be lifted and set in the bottom of the intake excavation. The invert, carrier, crown and sides, each containing all installed utilities and sub-assemblies, were then hoisted to the bottom of the intake, in order. Each part was directly attached to the elements already in place, reattaching the invert last.
After full reassembly the form was shifted 20m sideways using 200mm side adjustment cylinders and aligned with Tunnel 2. The form was then walked, as intended, to the downstream starting station of Tunnel 2 over the course of approximately one week. Although designed for the slope, a large moment was inflicted on the system as it was walked down the tunnel. When the carrier was raised and extended forward down the tunnel two screw jack feet on the lower end supported the majority of the system’s weight; along with a moment from the extended carrier. An anchor pin assembly was provided on the upper end of the form to arrest longitudinal forces, but it was difficult to prevent load transfer to the vertical supports. Extreme care was required while walking downhill to prevent damage to the screw jacks. Advancing the form back up the tunnel did not have the same challenges. The carrier was advanced and set in place while the form was still enclosed in the previous pour’s concrete. The tight encasement prevented any movement with loads being distributed into the concrete.
Adjustments had to be made after the first two pours to account for the rear of the form and carrier advancing into the poured liner. After the third pour a cycle was defined, although not close to the 24 hour target. A cycle consisted of fixing the form in place, building the bulkhead, pouring concrete, curing the concrete, striping the bulkhead, advancing the carrier, advancing the form, cleaning, oiling, and aligning the form for the next pour. After 10 pours the overall cycle was typically 48 hours (four shifts). Of the 48 hour cycle, concrete placement took only seven hours. The following shift stripped the bulkhead and moved the carrier forward. On the second day the form was advanced and reset. Night shift then started a new bulkhead and set up for the next pour. By the 15th pour the cycle had been reduced to 36 hours.
Several concrete mixes were submitted for approval to allow flexibility based on weather conditions and temperatures. Because placement happened during the spring and summer months a mix design with the highest water/cement ratio (0.42) and highest fly ash content (22 per cent) was used.
RFK determined this mix could be accelerated as needed to keep up with the pour schedule. Tight controls were necessary to ensure the concrete would perform as designed. Stripping strength of 4 MPa had to be reachable within 12 hours. Accelerator (typically 181ml/100kg cementitious) was added on site no more than 30 minutes prior to start of discharge. A minimum 180mm slump was needed because of the limited access behind the form to place and vibrate. At 220mm slump the concrete mix was too wet and began to segregate. The steep grade and use of high slump concrete helped to ensure all surface irregularities from the blasted rock were filled.
A Maturity Meter was used to monitor temperature production and rate of hydration of the placed concrete to allow stripping as soon as the concrete reached strength. Trial batches defined the rate of compressive strength gain to the Time Temperature Factor (TTF) output of the meter. When the TTF read 350 the bulkhead could be safely stripped (2MPa), as soon as it read 450 (4MPa) the concrete was self-supporting and the steel form could be advanced.
Results
Design of the tunnel form was based on the goal of placing one section of the tunnel liner every 24 hours on a schedule of three shifts/day eight hours/shift. Actual durations resulted in an average of one placement every two days on the first tunnel (25 pours in 49 work days) and one placement every 1.5 days (23 pours in 37 work days) in the second tunnel. Actual production was based on two shifts working 7:00am to 5:00pm and 6:00pm to 4:00am. Timing of the shifts allowed for a hot change from day to evening shift when required, but hot changes were not possible from evening to day shift. Pours that could not be started by the beginning of night shift were pushed back to the start of the next day shift.
Throughout both tunnels the pumping time averaged a stable seven hours, the variables of the cycle were the time spent curing, breaking down, moving forward and resetting the form. After initial start-up kinks were worked out the first tunnel typically required a minimum of two full shifts to move and set up the form.
If a pour started on Monday morning, the form could be set up to pour again Tuesday evening. Difficulties in securing concrete for evening pours, necessary conservative scheduling of start times, shift limitations and the learning curve extended the average cycle to a full two days. In the second tunnel, experience led to faster cycle times and tighter scheduling allowing pours as often as every 26 hours. Shift and material availability limitations as well as the continued learning curve pushed the average cycle to 36 hours.
An unexpected challenge of the concrete liner was excessive bug hole formation which required extra work to meet the nish requirement. In common concrete work a flat slab is placed with no upper form allowing entrapped air bubbles to escape into free air at the surface. A troweled nish would meet the finish specification with little or no follow up work. Vertical walls are vibrated in place allowing air bubbles to escape out the top of the pour, typically leaving only a small number of bug holes in the vertical surface depending on the concrete mix and placement practices.
The exposed face of a vertical wall should require limited effort to fill bug holes and patch rock pockets in order to meet a Class II finish.
The concrete placed below spring line in this project was cast against the broad surface of the form. The shallow curve of the large radius did not allow air bubbles to slide along the steel and escape into free air. The number of bug holes experienced required a rubbed finish to be installed below spring line in the whole of both tunnels. A stiff sand and cement grout was troweled over the concrete, allowed to take initial set and "rubbed" to create a uniform flat surface. The number of man hours spent finishing the concrete were comparable to the number spent placing it.
Efforts to improve the finished concrete surface included monitoring and fine tuning placement procedures, testing various form release agents, and minor adjustments to the mix design. Variables associated with placement include injection ports, which ones and how often they are switched; and vibrator use sequence and duration. Several form release agents were tested to see if a water-based product could be found to further reduce bug holes. Oil based form release agents were not used as any residue would create a slip hazard on the tunnel slope.
Adjustments to the concrete mix design primarily included minor changes to the slump, entrained air content, and various workability admixtures of the concrete. The ne tuning efforts had little effect on the rate of bug hole formation but did result in more efficient placing procedures and consistent concrete mix. The finish was also more consistent, though it still did not meet the finish requirements.
Regardless of the highlighted struggles, the methodology and use of the full round form proved to be an effective choice for this project. The challenging slope was managed and a round concrete surface meeting the structural, shape, and alignment requirements was produced. Very little remedial finish work beyond the patching of bug holes was required in any area.